
Autofill for applications on Windows for experts
Sticky Password gives you the flexibility to define autofill functionality just the way you need it for websites and applications.
In this tutorial we’ll show you how to automatically log in to applications that use login forms with multiple fields.
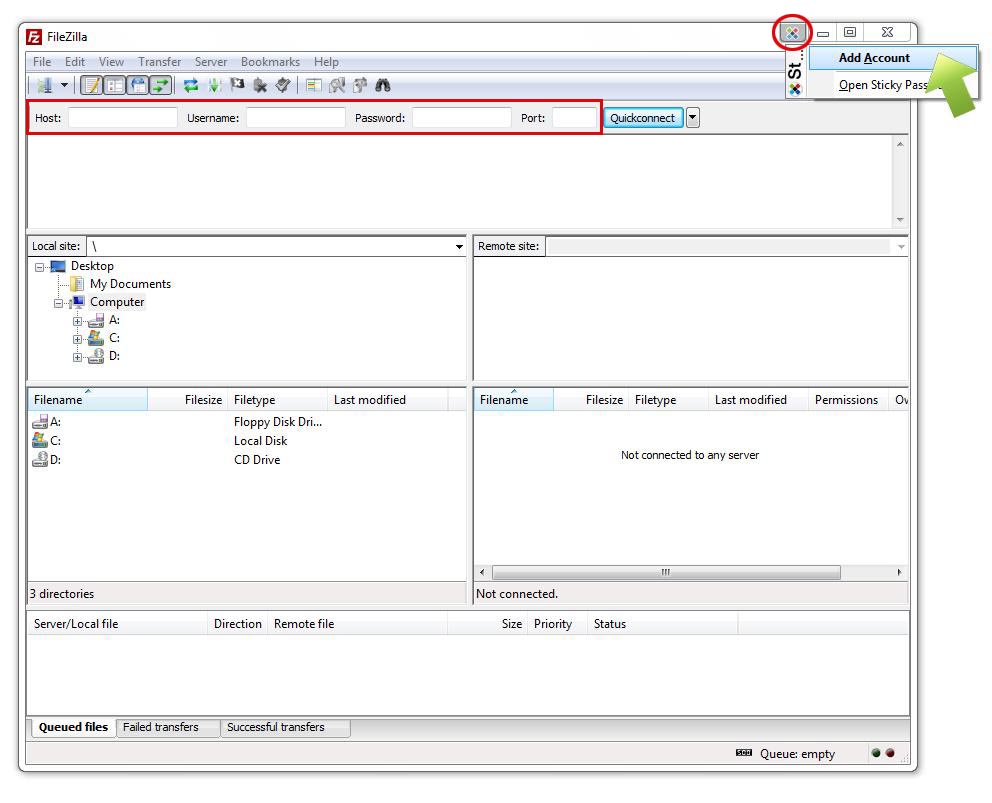
For our example today, we’ll show you how to create an App Account with multiple fields using the login form found in the FileZilla FTP client. There are four fields. Besides the usual Username (Login) and Password fields, there are also Host and Port fields. (For purposes of this tutorial, we’ll be using an actual account.
To start, leave all the fields empty and click the Caption button - Add Account.
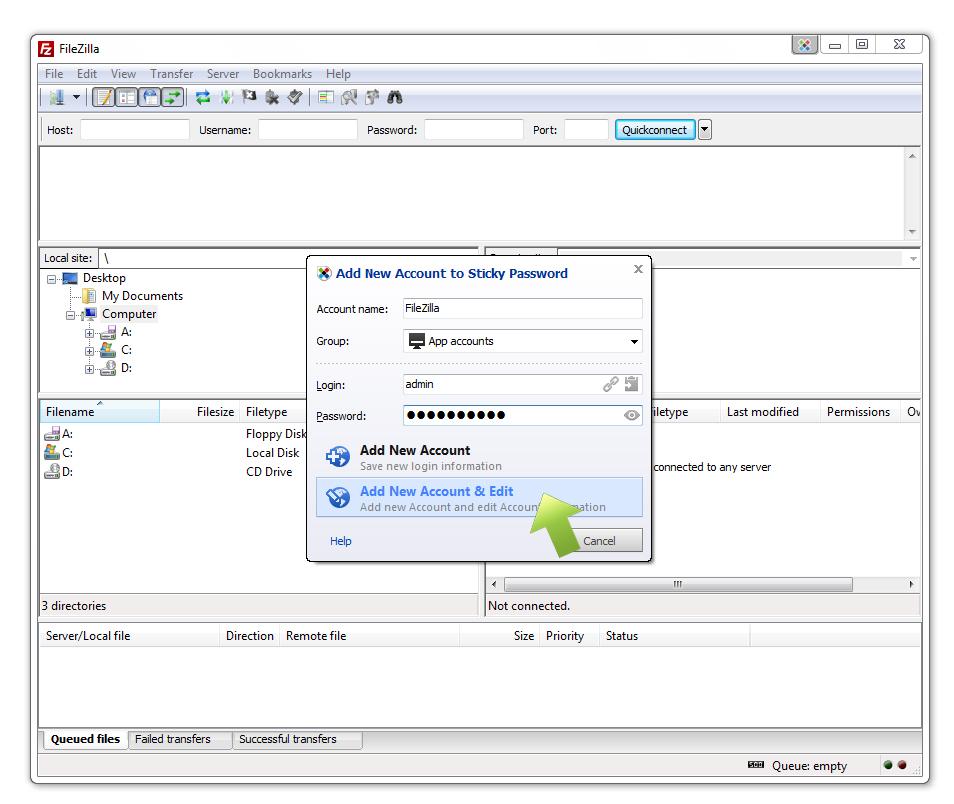
Sticky Password will prompt you to save a new account.
Enter your Login (Username) and Password. Click Add New Account & Edit.
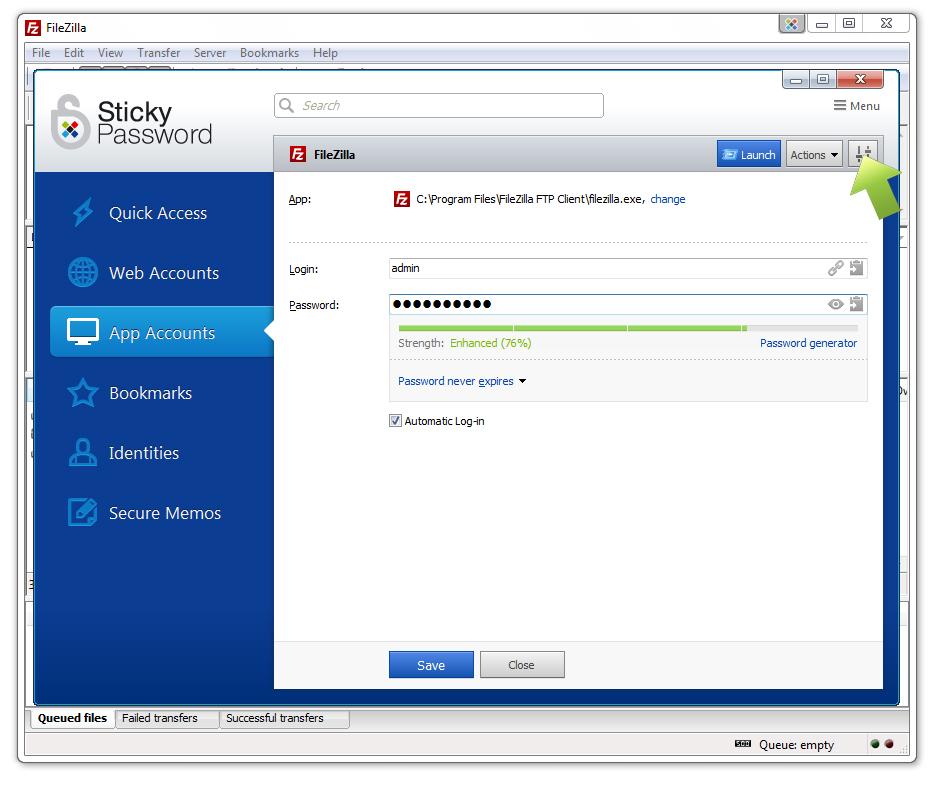
Click the Settings icon in the top right corner to open the Settings menu.
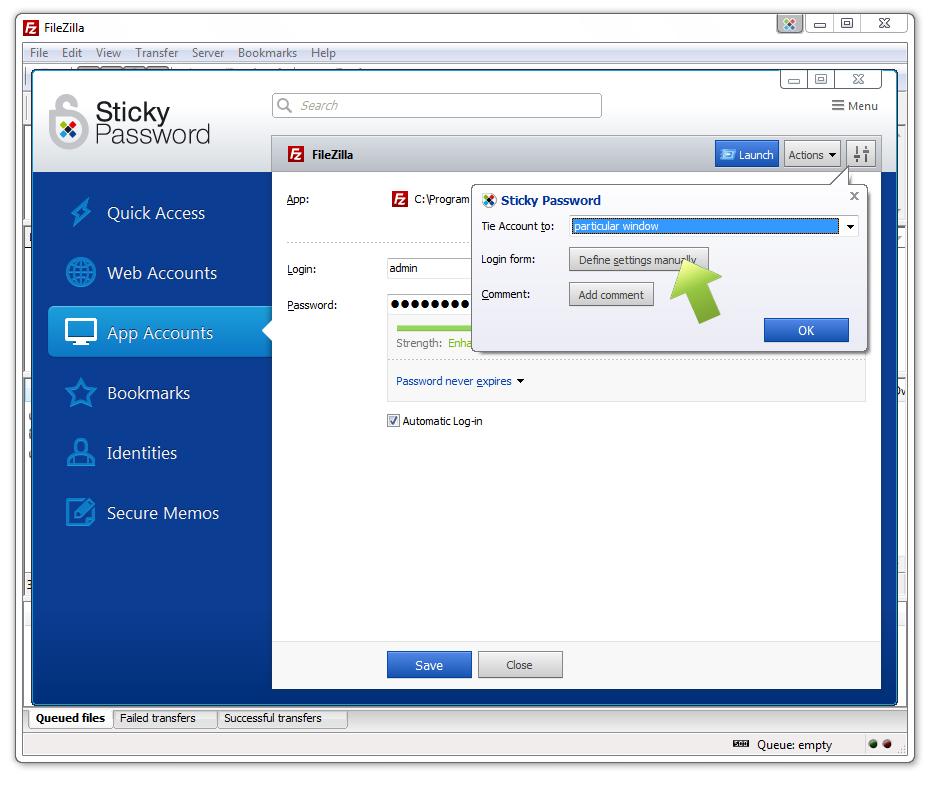
Click Define settings manually.
The Manual form edit dialog window will appear, and we can begin filling in the data.
Here’s the key to Manual form editing.
Each field on the page can be defined as requiring a “Value” (this can be any data required on the page!), or the specially-designated “Login” and “Password” fields. (A page can have no more than one unique Login, and also no more than one unique Password. When multiple Login fields or multiple Password fields appear on a page, Sticky Password will populate the Login and Password saved for that account into all appropriate fields.) Using this Manual form edit, you are able to define each field manually using the buttons in the Assign selected field to: section at the top of the Manual form edit dialog.
In the bottom section, you’ll see the FileZilla login form.
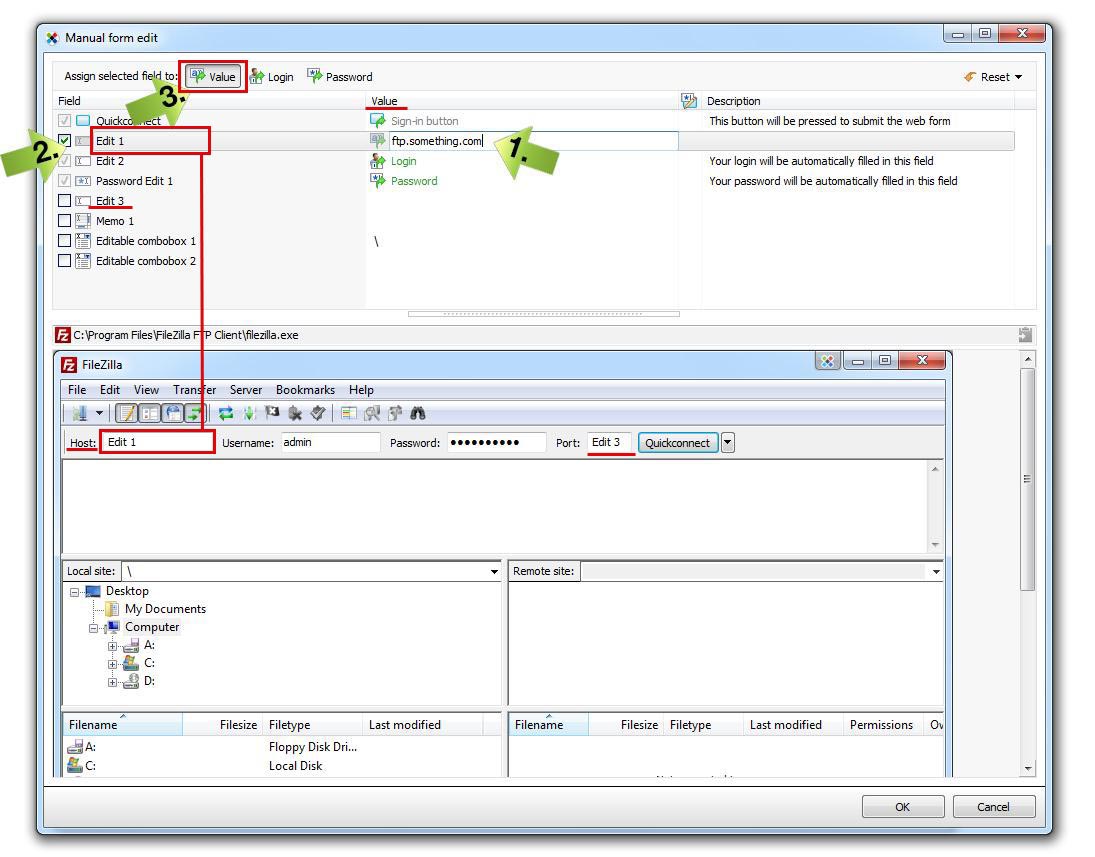
1. We can begin with Host field (identified as Edit 1). In the Value column click, in the row labeled Edit 1 the upper part of window to enter the host name. In this example, I’ll use ftp.something.com, but you should enter the address you’ll be logging into in this field.
2. Verify that the checkbox is checked. Only the fields with a checked checkbox will be autofilled.
3. Click the Value button for this field.
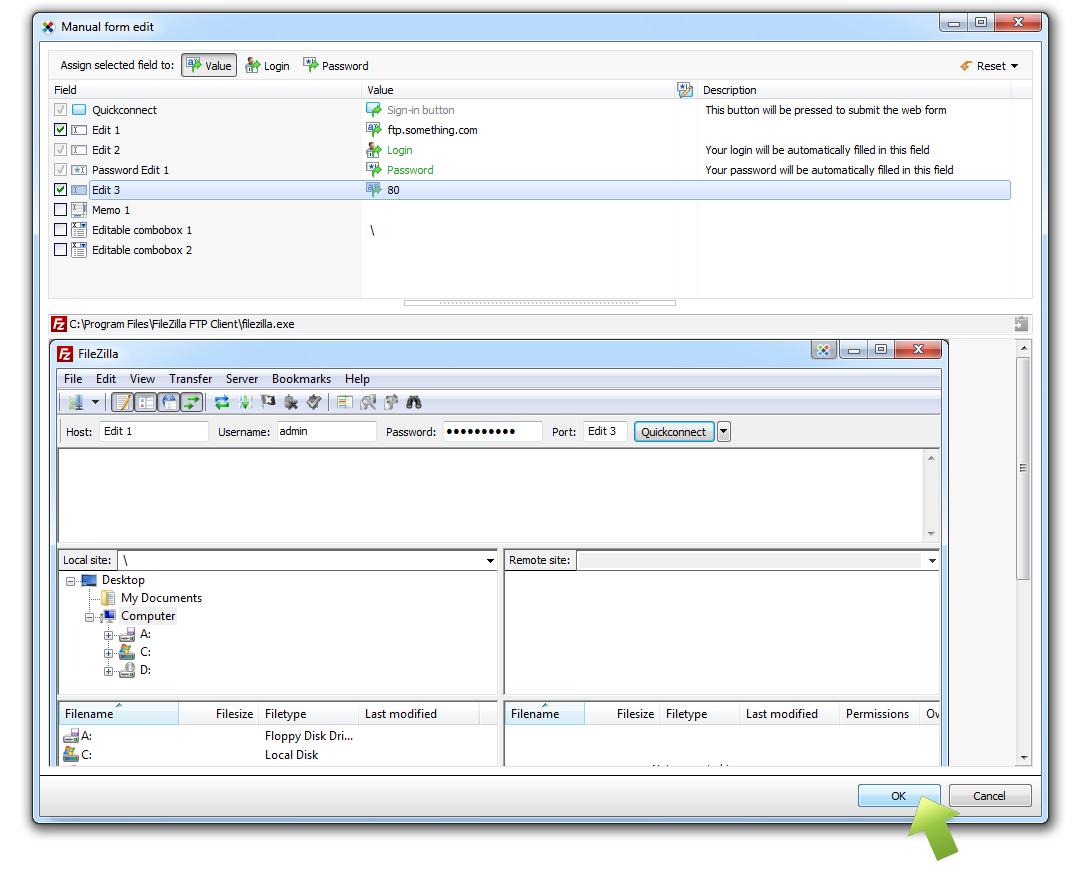
Note that the special fields designated as Login, Password and Sign-in button are automatically checked!
If you want to enter value for the Port field (identified as Edit 3). Simply click in the Value column of the row labeled Edit 3, and enter your value. Don’t forget check the checkbox (2.) and verify that you’ve clicked the Value button (3.) for this field.
Once you’ve entered all the information you need, click OK to continue.
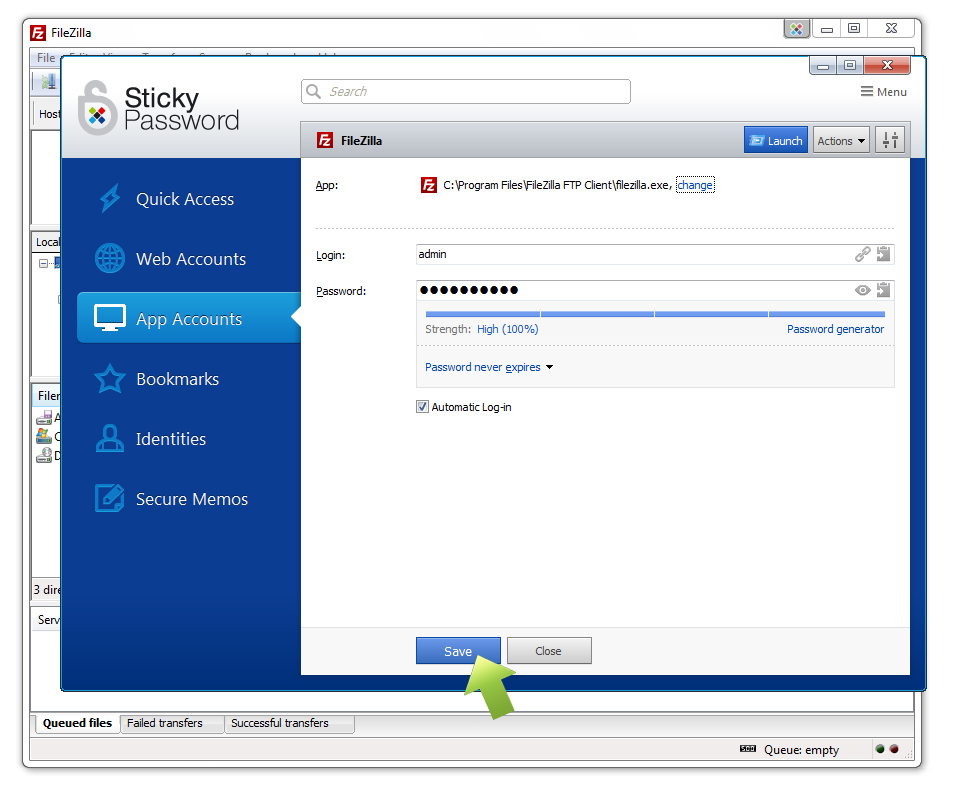
Click Save.
Now you’re all set to autofill applications with multiple fields.
Sticky Password also allows you to have automatic logins for websites that requires one or more fields in addition to your login and password, as well as sites that ask for atypical or unusual data. View the tutorial to see how easy it is to set up automatic logins for sites that have atypical requirements.
Как нам улучшить ответ?
Отправить отзывСпасибо!
Спасибо! Мы сделаем все возможное, чтобы улучшить этот ответ.
Произошла ошибка. Приносим извинения за неудобства. Повторите попытку.