
Login automatically even on unusual web pages on Windows
With Sticky Password, it's easy to log in to even strange and unique online login forms.
In today’s tutorial, I’ll show you how to set up your automatic logins for websites that require one or more fields in addition to your login and password, as well as sites that ask for atypical or unusual data. (Banks and other financial institutions often require additional data on their login pages.)
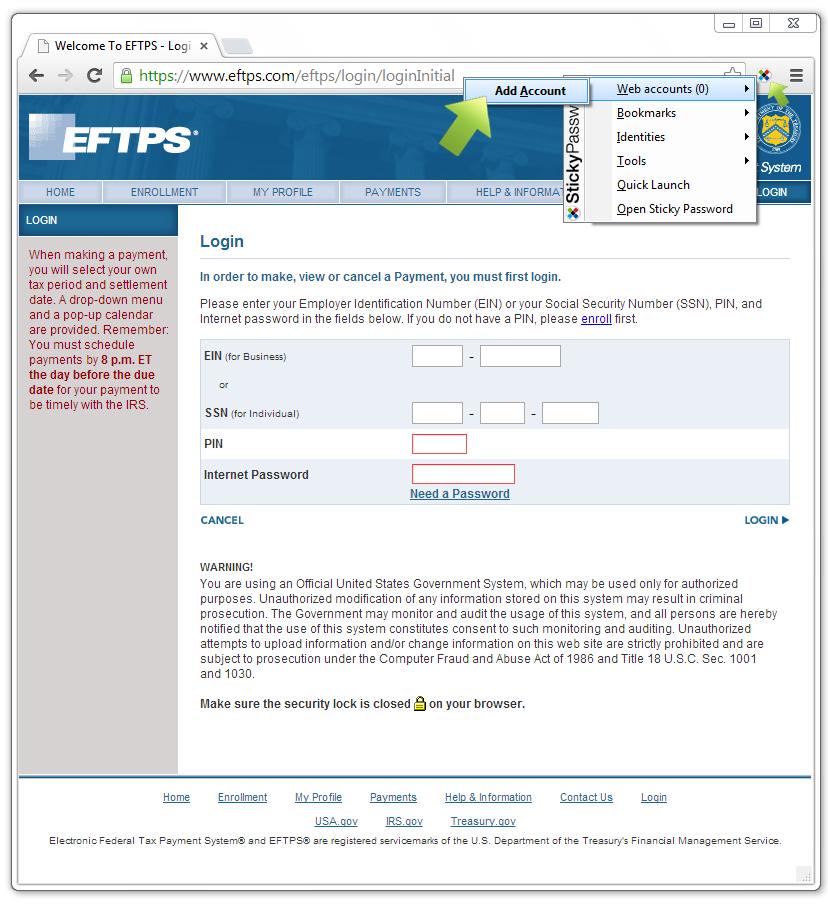
For this lesson, we’re going to take a look at the U.S. Electronic Federal Tax Payment System website. The link to their login page is https://www.eftps.com/eftps/login/loginInitial. Here, you’ll see a nice example of a login form with multiple fields: in addition to the PIN (which is what they call their login) and password, the page requires that the visitor also enter an Employer ID Number (EIN) or a Social Security Number (SSN).
I’ll walk you through creating a new account for this login form. (Note that this is the login page. For the purposes of this tutorial, we’ll take for granted that we’ve already enrolled and are working with a valid account.)
We’ll start by leaving the form empty and clicking the Caption Button - Web Accounts - Add Account.
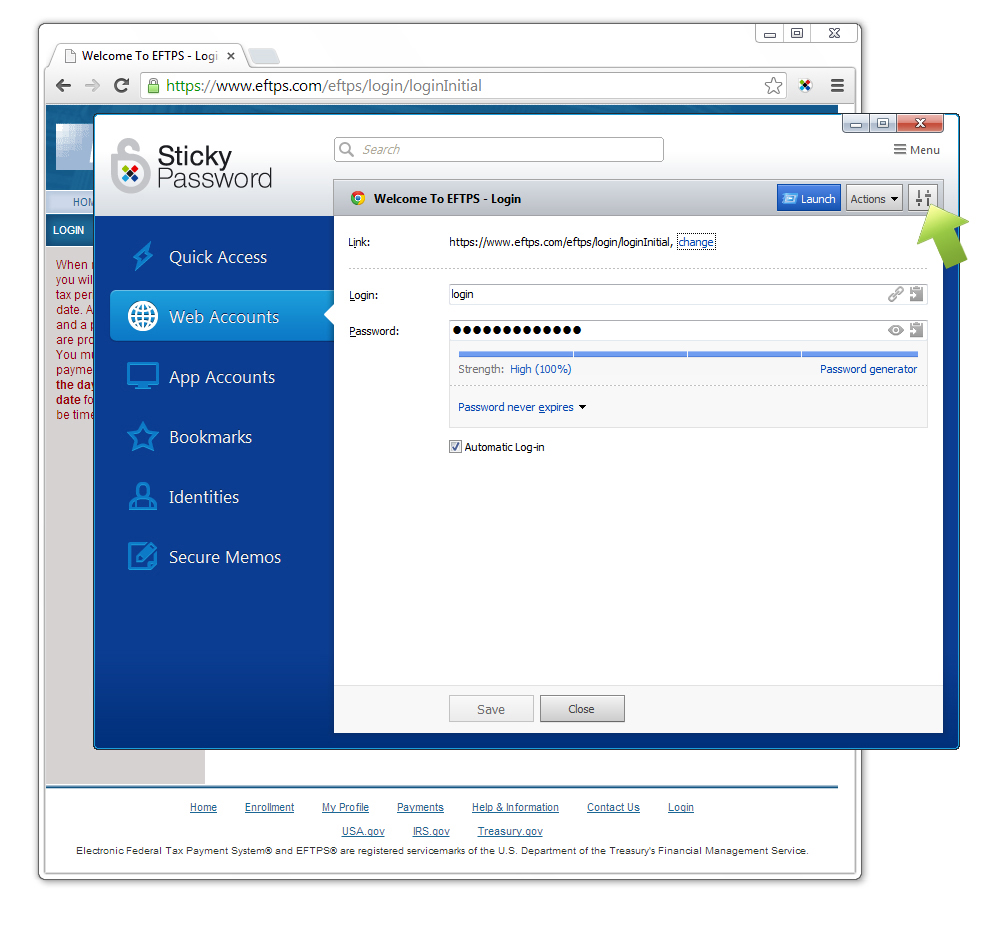
 Sticky Password will prompt you to save a new Account.
Enter the PIN and Password that you created when you enrolled. Click Add New Account & Edit.
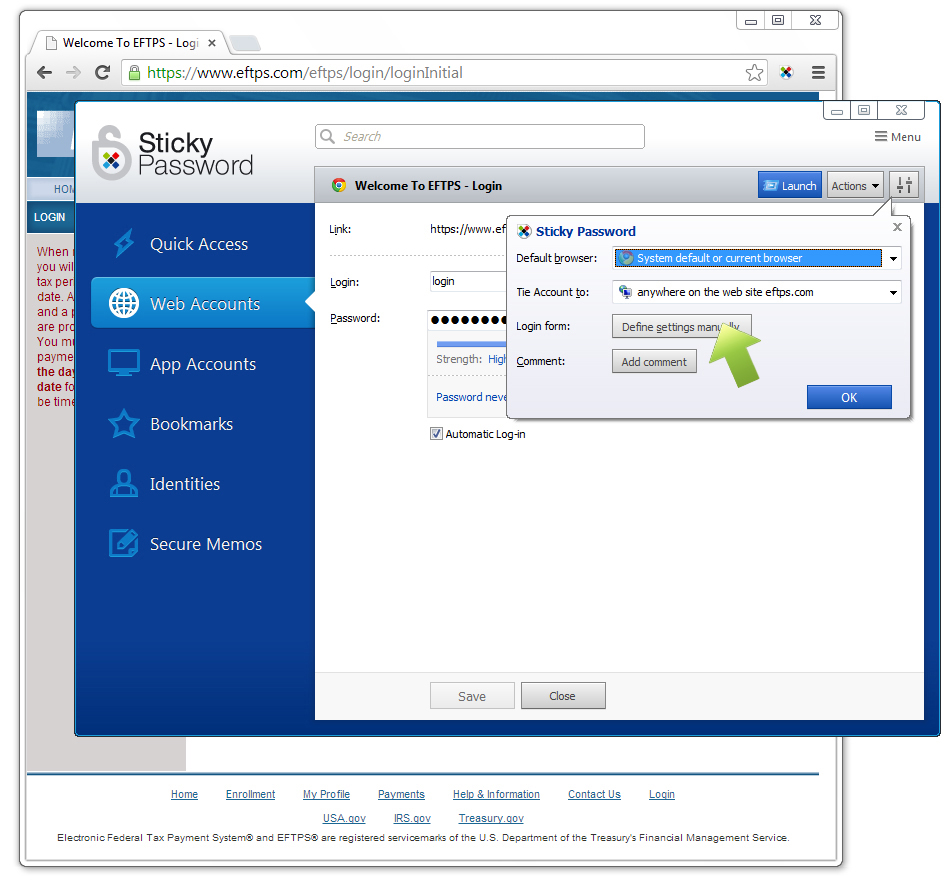
 Click the Settings icon in the top right corner
to open the Settings menu.
Click the Settings icon in the top right corner
to open the Settings menu.
Click Define settings manually.
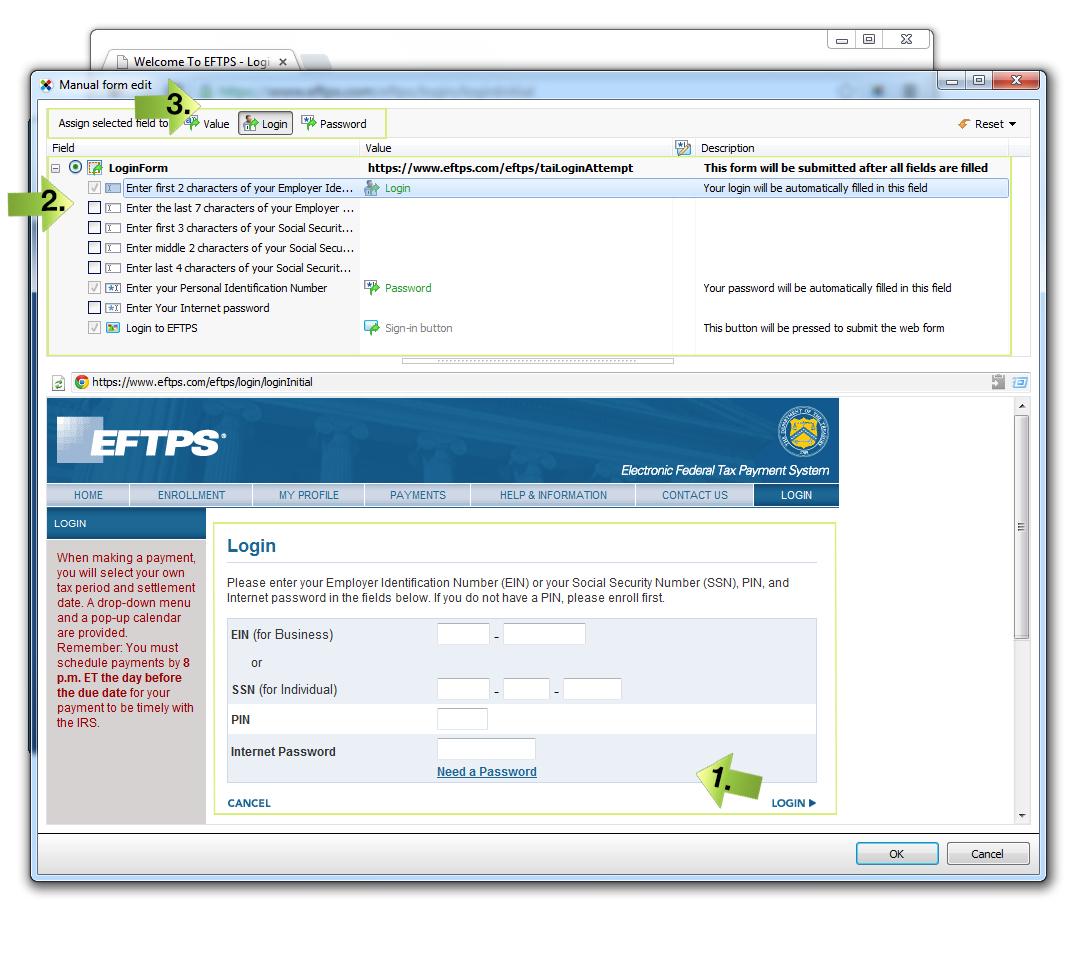
The Manual form edit dialog window will appear.
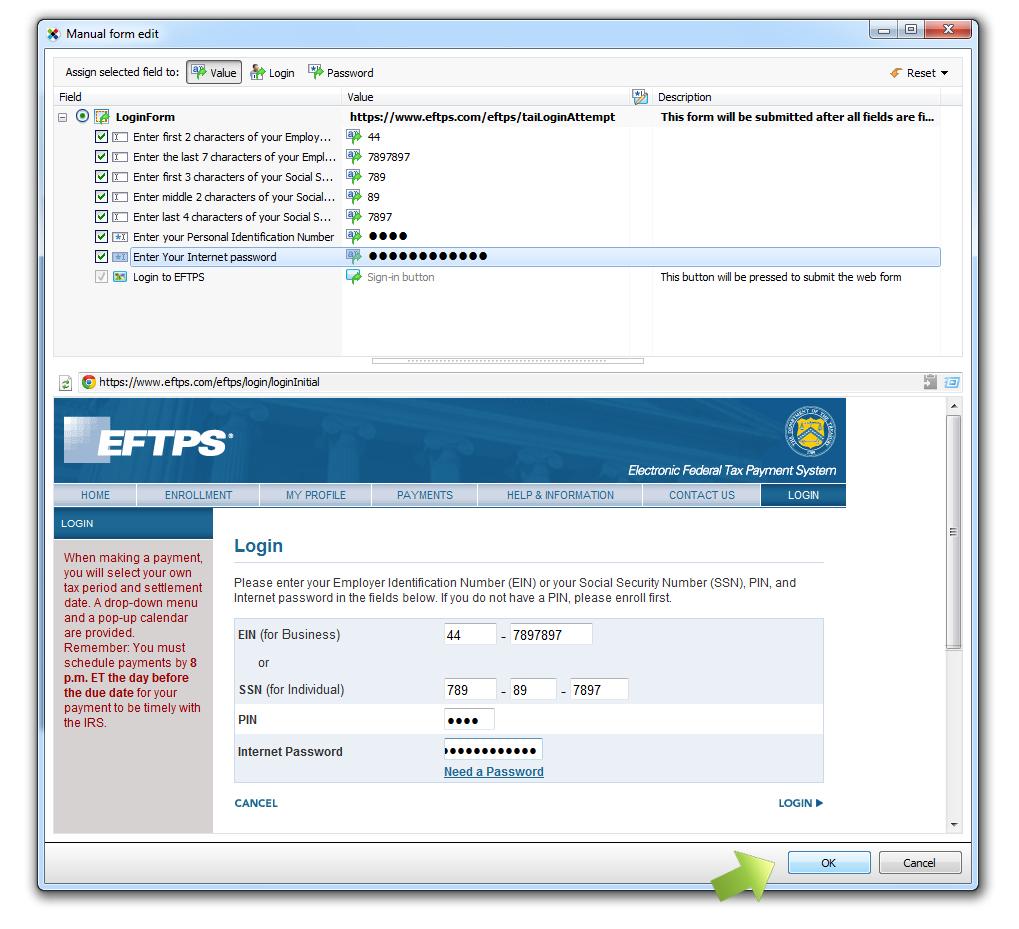
In the bottom section, you'll see the login form with all the various fields on the page.
1. You can enter the values directly into web form. In this example, this would be your EIN or SSN, plus the PIN and the Password.
Just above this section, you’ll see listed all of the fields on the page that can be filled in.
2. Alternatively, instead of filling in your data as in bullet 1, above, you can edit any of the fields in this section.
Here’s the key to Manual form editing.
Each field on the page can be defined as requiring a “Value” (this can be any data!), or the specially-designated “Login” and “Password” fields. (A page can have no more than one unique Login, and also no more than one unique Password. When multiple Login fields or multiple Password fields appear on a page, Sticky Password will populate the Login and Password saved for that account into all appropriate fields.) Using this Manual form edit, you are able to define each field manually using the buttons in the Assign selected field to: section at the top.
3. In order to have Sticky Password automatically fill in additional fields, all you need to do is to enter the values, and then click on Value for that field. You can also (re-)define the field that you’d like your Login or Password to be used in: simply select Login or Password.
Of course, you can edit your Login and Password whenever you need to directly in the Account.
 Now we’ll fill in the rest of the data for the login page in our example.
Let's start filling out the multiple fields on the login form:
1. Place the cursor into the first field. Enter the first value, e.g. “44”. As I already mentioned, you can also enter the value directly in the upper part of window in the Value column in the highlighted row.
2. Click the Value button for this field.
3. Verify, that the checkbox is checked. Only the fields with a checked checkbox will be autofilled.
Note that the special fields designated as Login, Password and Sign-in button are automatically checked!

Continue to all the other fields, entering the required values wherever necessary. Verify that the appropriate checkboxes are checked. Then click OK to continue.
Click Save.
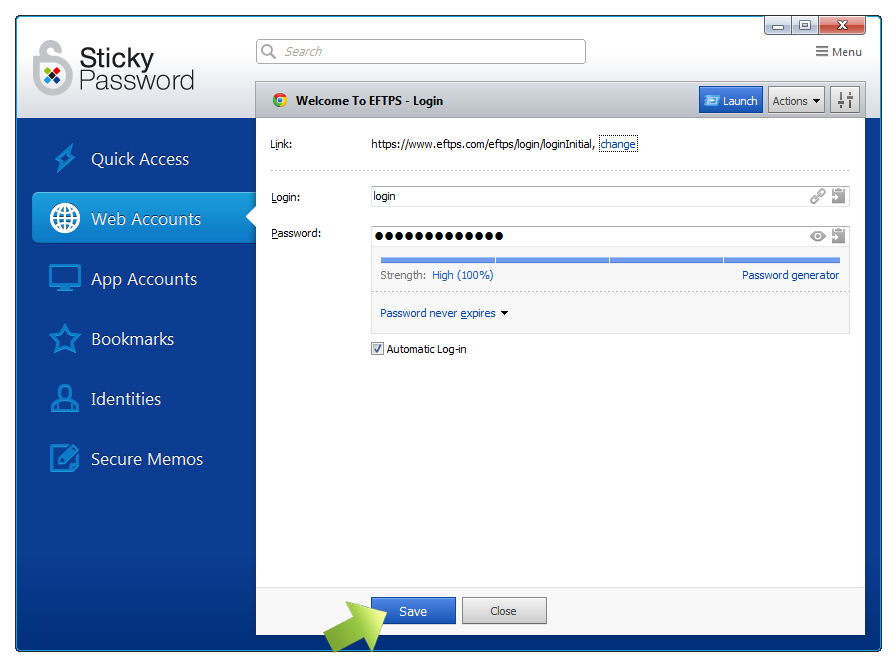
That’s it - you’re all set.
The next time you visit this webpage ( https://www.eftps.com/eftps/login/loginInitial), Sticky Password will automatically fill in the necessary fields on the login form and you’ll be signed-in automatically.
How can we improve the answer?
Send feedbackThank you!
Thank you! We will do our best to make this answer better.
An error has occurred. We apologize for the inconvenience. Please try again.