
Organizing data using groups on Windows
Organize your Sticky Password data using the groups. Let’s take a look at how to create groups for your Web Accounts on Windows, and how to manage your Web Accounts using groups you create.
Creating a group
-
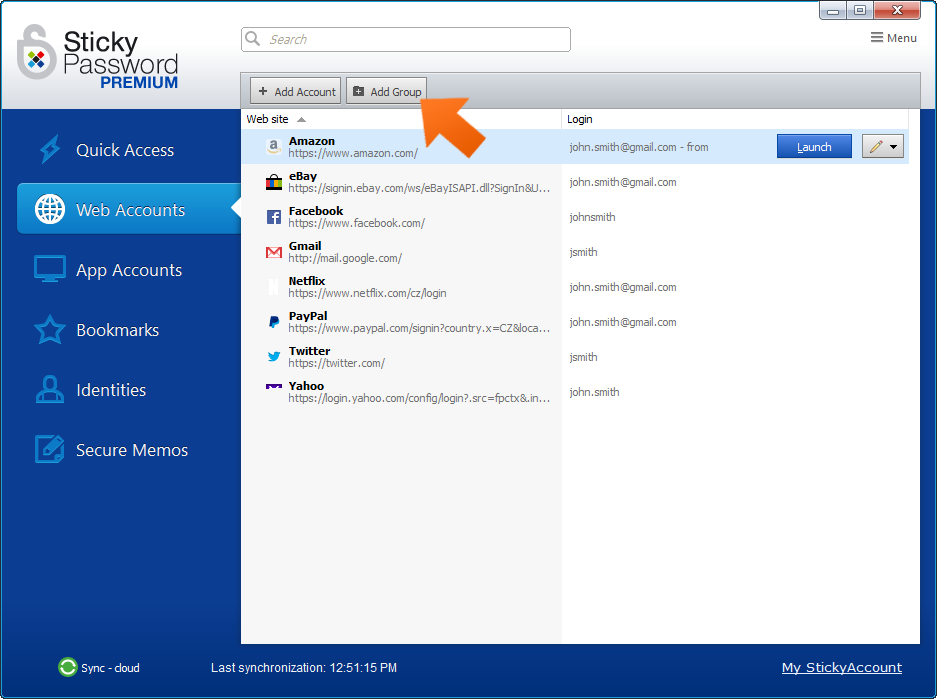
Open the Sticky Password main window, select Web Accounts and click Add Group.
-
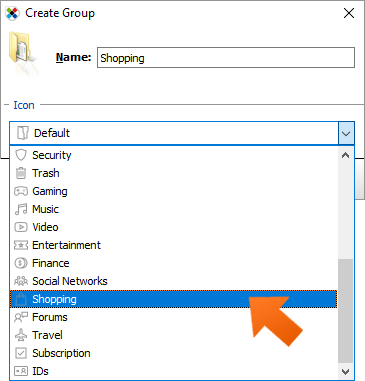
Enter a name for your group, select an icon (or leave the default) and click OK.
Moving your Web Accounts into a group
-
Simply drag the Web Account you want to move and drop it into a group. Alternatively, click the pencil symbol, click Move to Group and select the group you want to move the item to.
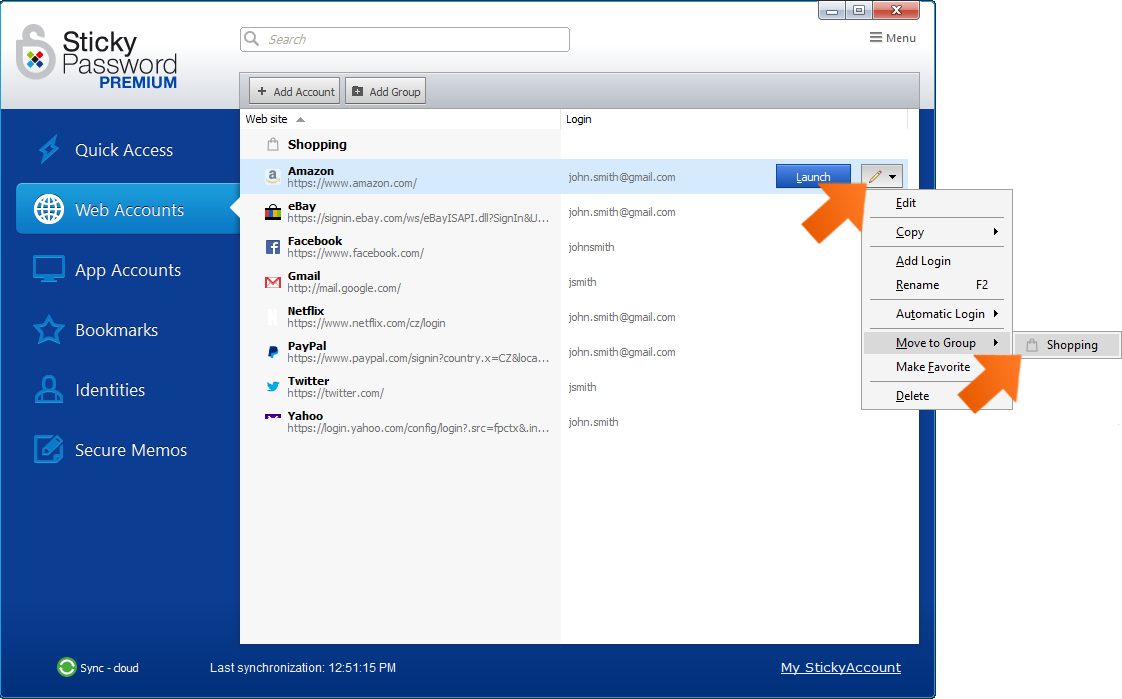
To remove a Web Account from a group, you can drag and drop it out of the group. Or, click the pencil symbol, click Remove from Group and the Account will be removed from the group.
-
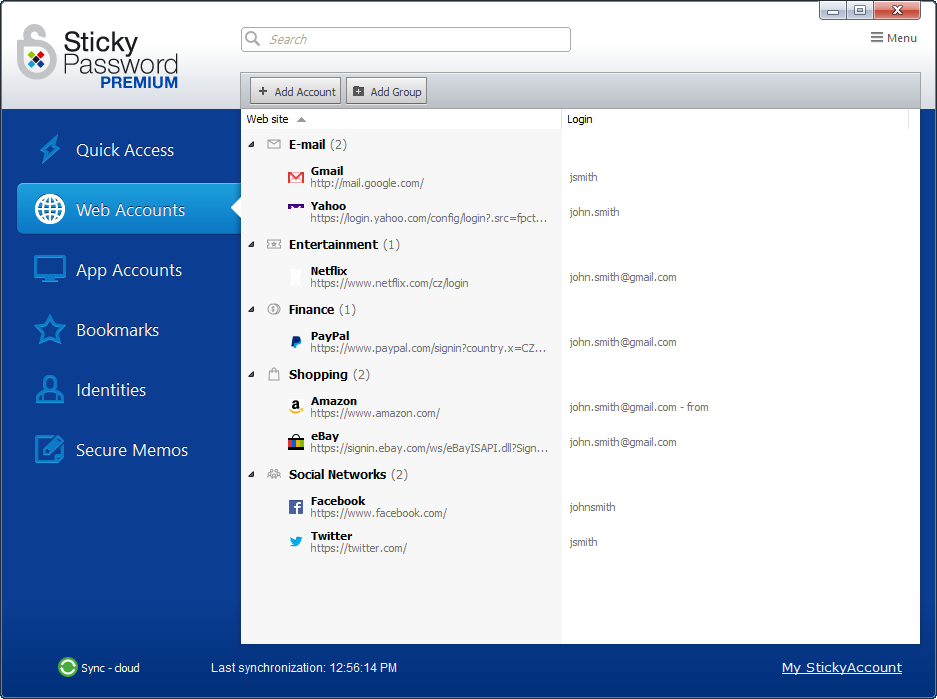
Now you can move all your Web Accounts to groups. And just like that, you've cleaned up your Web Accounts!
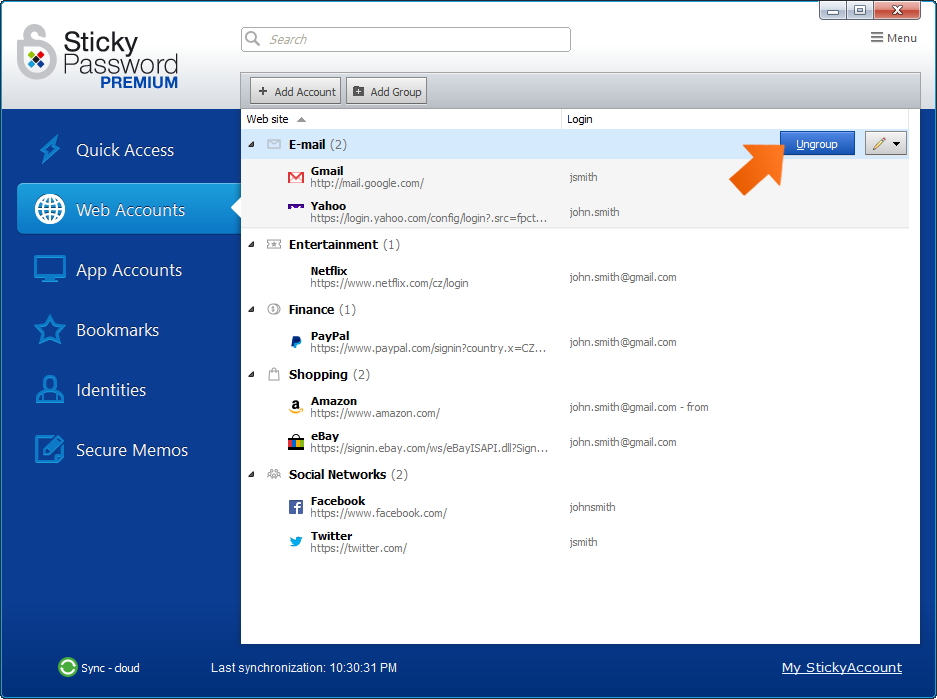
Ungrouping
To delete a Group you’ve created and ungroup all the Web Accounts in the group, just select the group and click the blue Ungroup button.
You can also group your App Accounts, Bookmarks and Secure Memos just the way you like it.