Installing the Sticky Password extension for Brave on Mac
The Sticky Password browser extension saves new data as you enter it and allows you to take full advantage of form-filling functionality, and also types your passwords for you when you log in to your favorite sites – so you don’t have to.
Installation of the Sticky Password extension on supported browsers is one of the optional steps in the First Run Wizard. With only a few quick steps, you can also install or re-install the extension manually at any time directly from the application.
Installing the Sticky Password extension for Brave
-
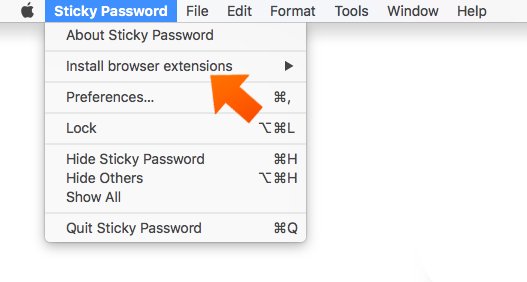
Click Sticky Password in the Mac menu bar and select Install browser extensions.
-
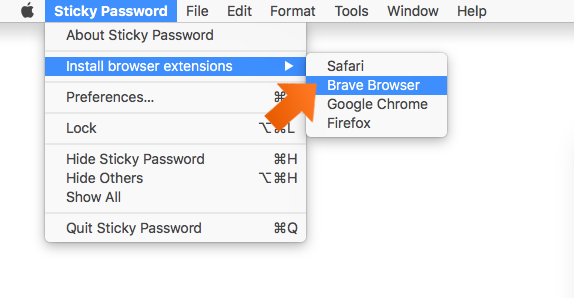
Select Brave to launch a new browser tab in Brave that makes it easy to install the new extension.
-
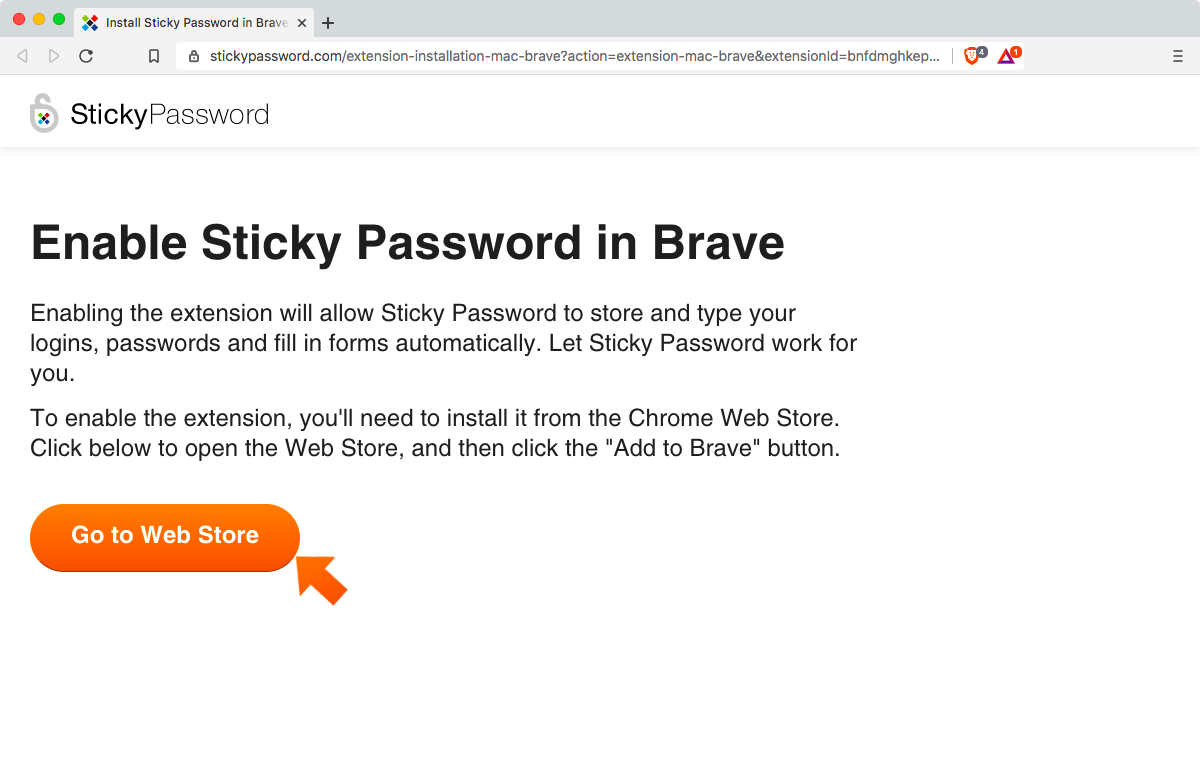
Click the Go to Web Store button.
-
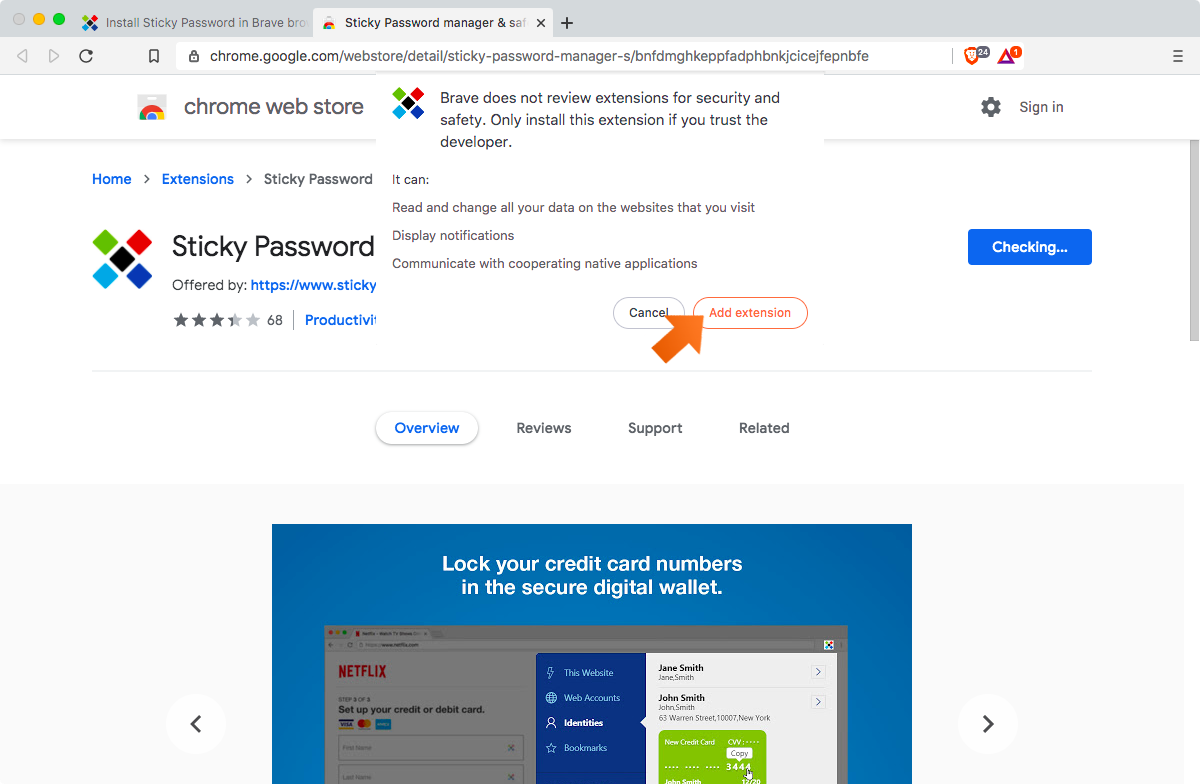
Click the Add to Brave button.

-
Click Add extension in order to install the Brave extension.
-
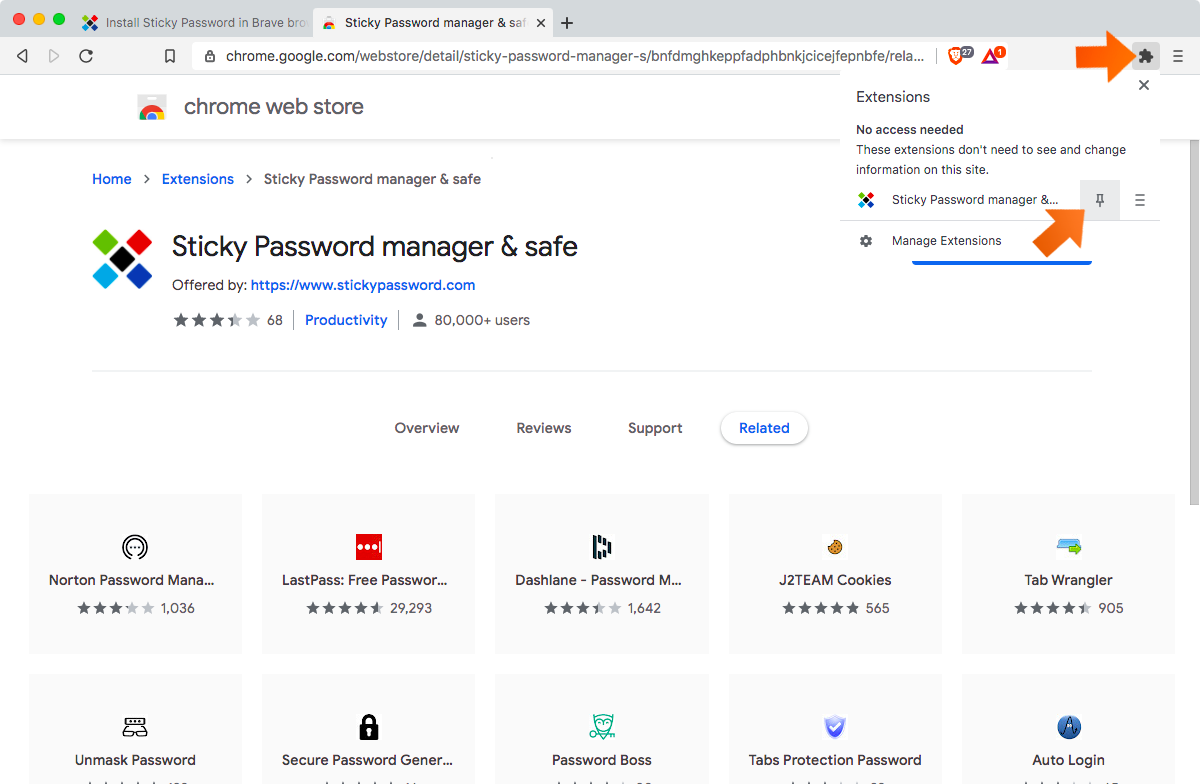
The extension is now installed. Click the pin symbol to pin the extension to the top.
-
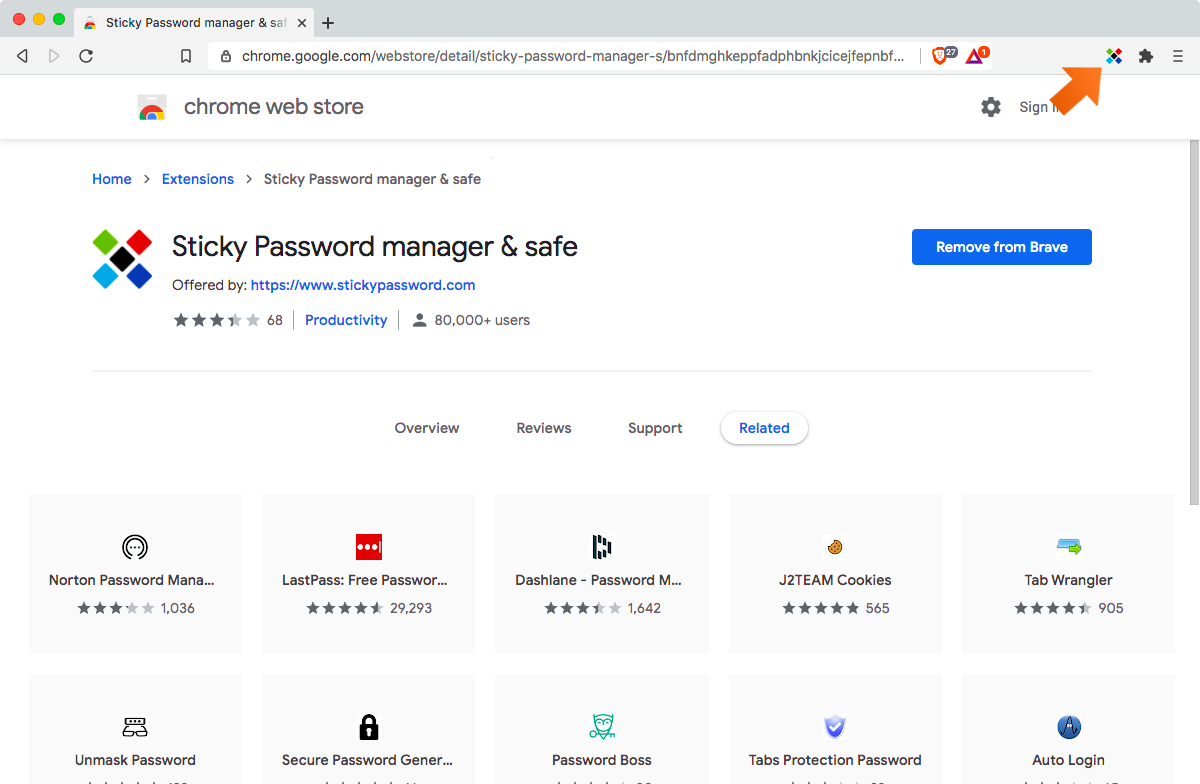
You’ll be able see the Sticky Password icon in the Brave toolbar. When Sticky Password is unlocked, the icon is in full color. When Sticky Password is locked, the icon is gray.
-
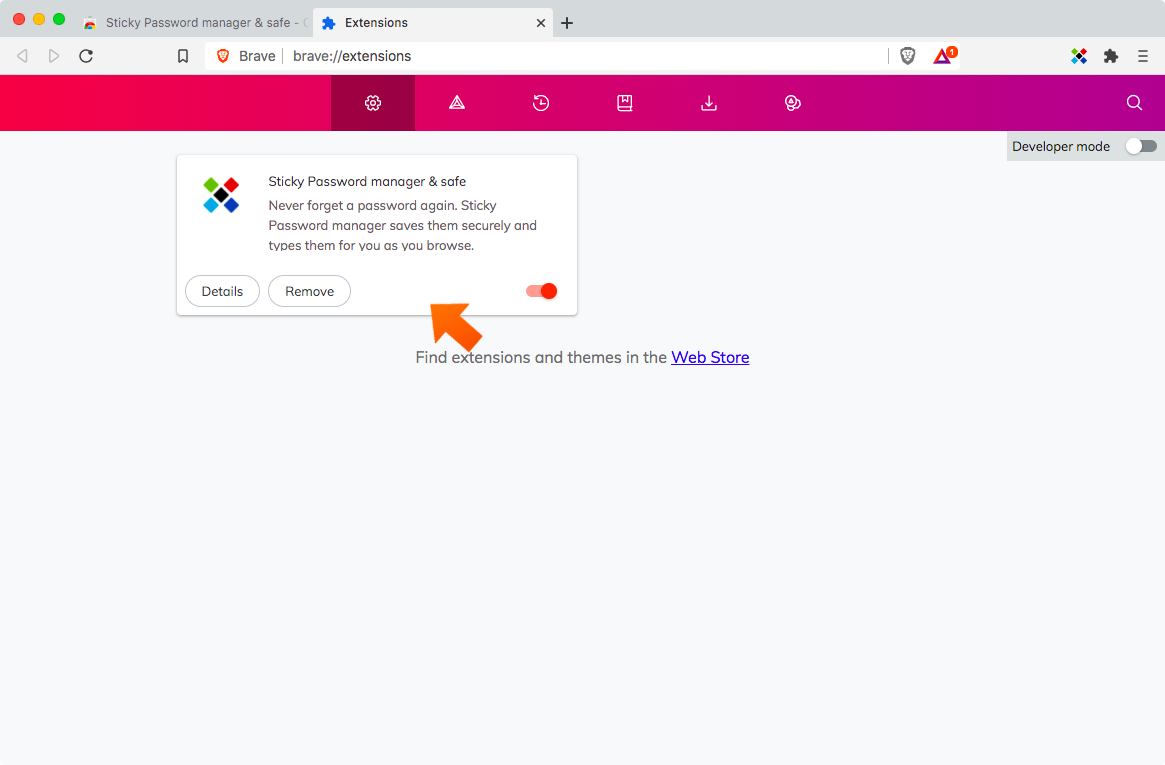
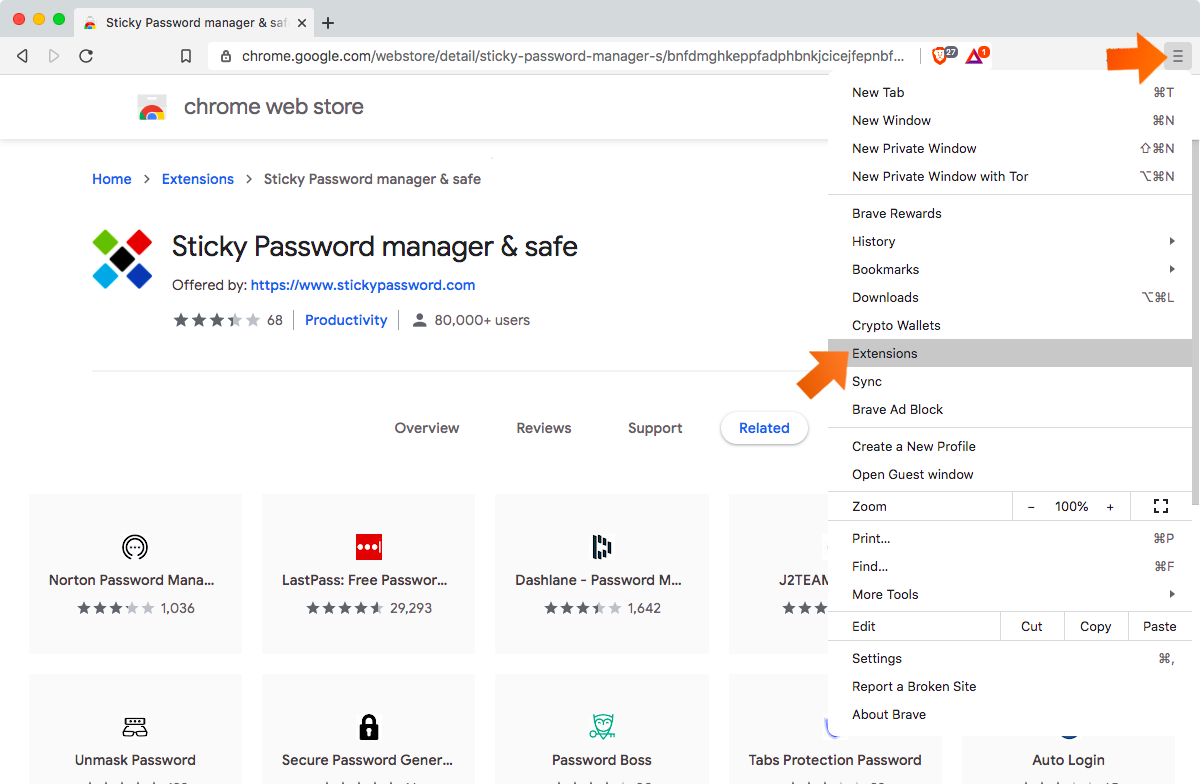
You can also check the Sticky Password extension directly on the Extensions page in the Brave browser. Click Menu icon – Extensions.
-
You can see that the new Sticky Password autofill extension has been installed and is enabled in your browser.