Contactless Connect

When autofill doesn't work—use Action Button

Android

On some Android devices, the standard autofill function may not work properly due to the specific way certain websites or apps are built. In such cases, you can use the Action Button to manually copy and paste your credentials into the login fields. In this FAQ, we’ll show you how to activate and use the Action Button step by step.

How to activate the Action button

The Action Button is disabled by default. If you’d like to use it, you’ll first need to activate it by following a few simple steps:

  1. Unlock the Sticky Password app and tap the Menu icon.
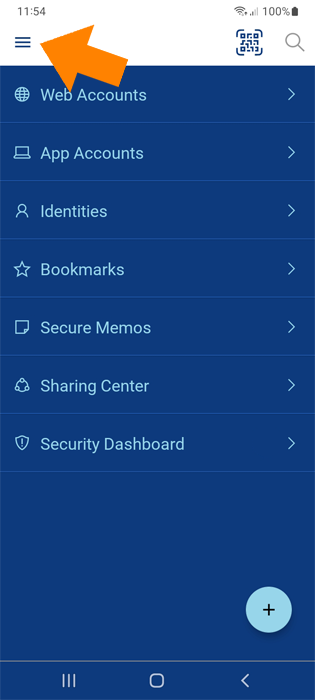
    Sticky Password mobile app interface showing the main menu with an orange arrow pointing to the hamburger icon in the top-left corner.
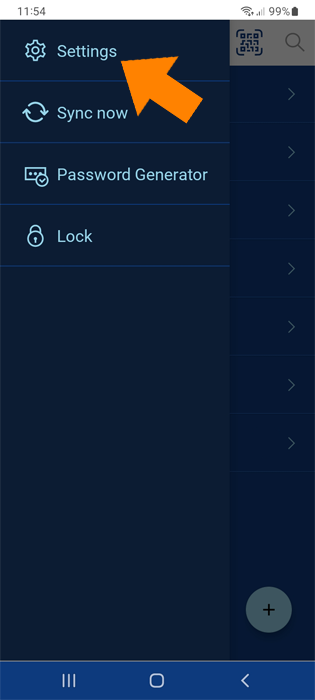
  2. Tap Settings.

    Sticky Password mobile app with the side menu expanded and an orange arrow pointing to the “Settings” option at the top.
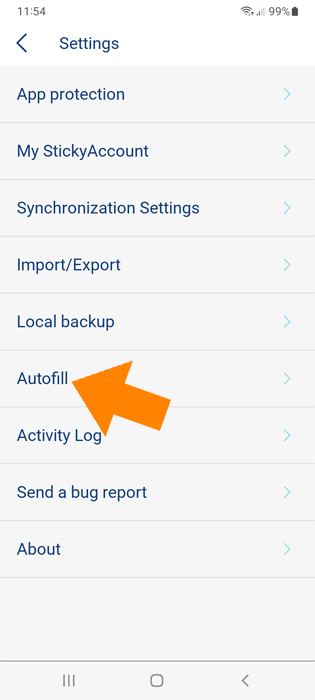
  3. Tap Autofill.

    Sticky Password Settings screen with an orange arrow pointing to the “Autofill” option in the list.
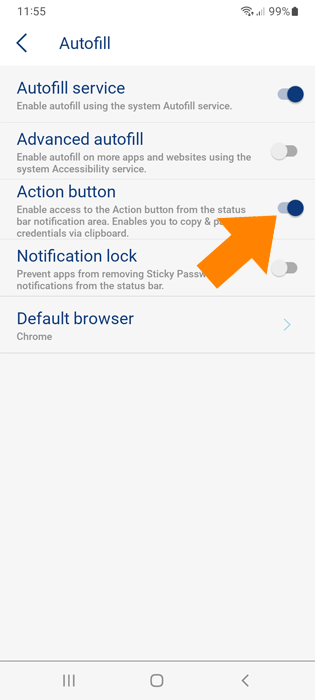
  4. Enable the Action Button.

    Sticky Password Autofill settings screen with an orange arrow pointing to the enabled “Action button” option.
  5. Depending on your device settings, you may be prompted to allow Sticky Password to display over other apps (also known as "Appear on top" permission).
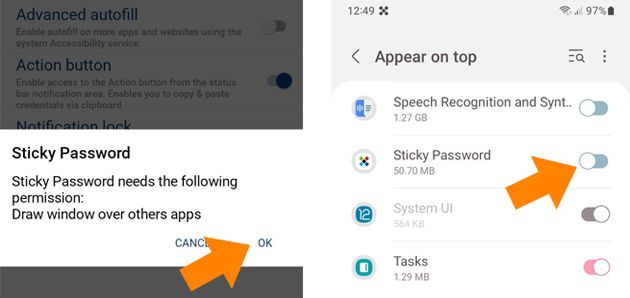
    Screens showing permission request and toggle to allow Sticky Password to appear over other apps.

    The Action Button is now activated and ready to use.
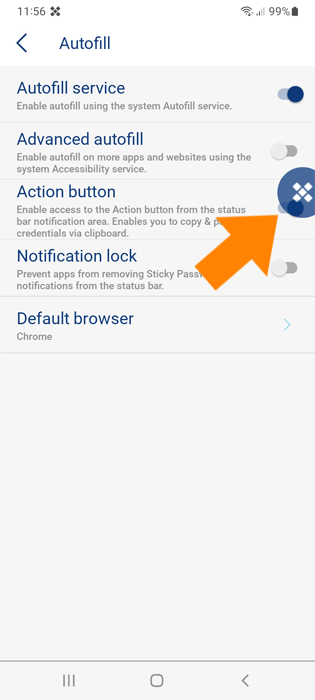
    Autofill settings screen with the Sticky Password Action button visible and highlighted.

How to use the Action button

  1. Go to the website or application you want to log in to.

  2. Tap the Action Button, then tap the magnifying glass icon that appears beside it.
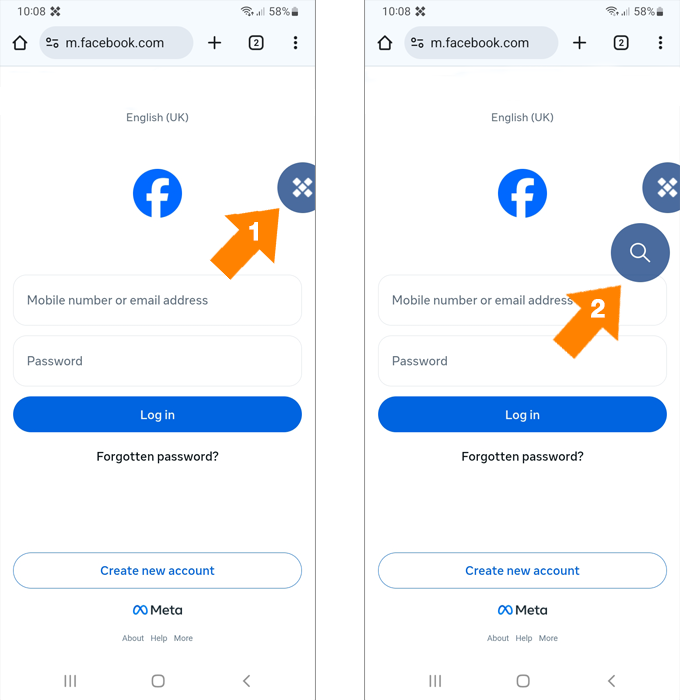
    Two-step illustration showing the Sticky Password Action button on the Facebook login page and its expansion into a magnifying glass icon for autofill.
  3. A list of your saved accounts will be displayed. Select the Login credentials you want to use for signing in.

    Sticky Password autofill prompt showing a list of saved logins, with an arrow pointing to the Facebook entry.
  4. Tap the Login icon to copy your login to the clipboard.

    Sticky Password Action button expanded on the Facebook login page, with an arrow pointing to the user icon for autofill.
  5. Now you can paste it in the appropriate (login) field, long tap the first input field and tap Paste.

    Facebook login page with an arrow pointing to the email field where Sticky Password has triggered the paste option.
  6. Tap the Password icon to copy your password to the clipboard. Then paste it in the password field, long tap the second (password) input field and tap PASTE.

    Facebook login page with email pasted into the field and arrows pointing to the Sticky Password clipboard icon and the “Paste” popup.
  7. That’s it! All that’s left to do is click Log In to access your web account.

    Facebook login page with filled-in credentials and an arrow pointing to the “Log in” button.

From within a browser

You can use the Action button with your preferred browser at any time.

  1. Simply run a browser and swipe down to reveal the notification bar. The Sticky Password action button lives here! Tap Show Action Button.
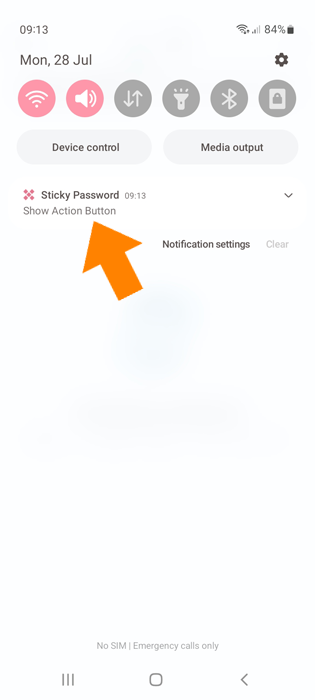
    Android notification panel with an arrow pointing to the Sticky Password notification to show the Action Button.
  2. Unlock Sticky Password with your Master Password.
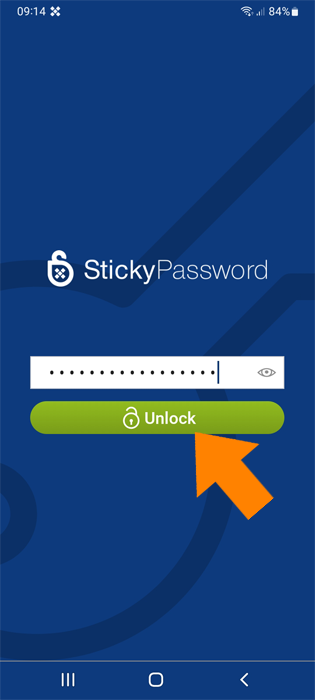
    Sticky Password login screen with an arrow pointing to the green “Unlock” button below the Master Password field.

The Sticky Password Action button appears and is ready for use!
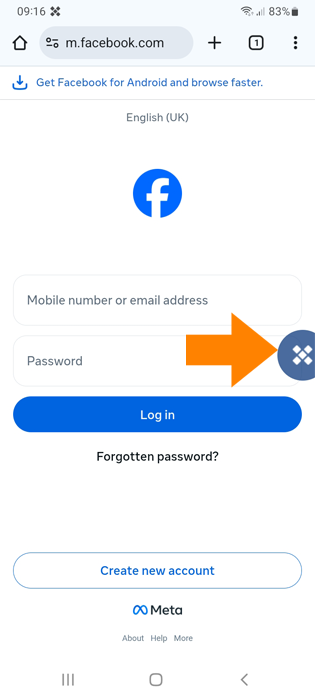
Facebook login page with an arrow pointing to the Sticky Password Action button next to the password field.

That’s everything you need to know to start using the Action Button as a reliable autofill alternative.

この回答は役に立ちましたか?

はい いいえ

ご意見をお聞かせください。

フィードバックを送信

有難うございます。

有難うございます。よりよいサポートをご提供できるよう努めます。

内部エラー。

メッセージをお受けいたしました。有難うございます。

通常 1 営業日以内にご返答いたします。
混雑状況により、それ以上かかる場合もございます。